So you’ve been lead climbing for years, on an assortment of rock types in a variety of different geographical areas. You’ve been benefitting from, and admiring the hard work of previous route builders, and now you’re feeling the desire to give back to the climbing community and start building routes of your own. Well good on ya! But the last thing you want is to be known as the guy or gal who puts up junk routes! A badly built route can be unpleasant and downright dangerous.
Route building can be very rewarding, but it takes dedication and thought to do it properly. Ideally it is best to learn the trade from a veteran route builder, but here is a comprehensive guide to ensure that your new route is a work of art you can be proud of for years to come.
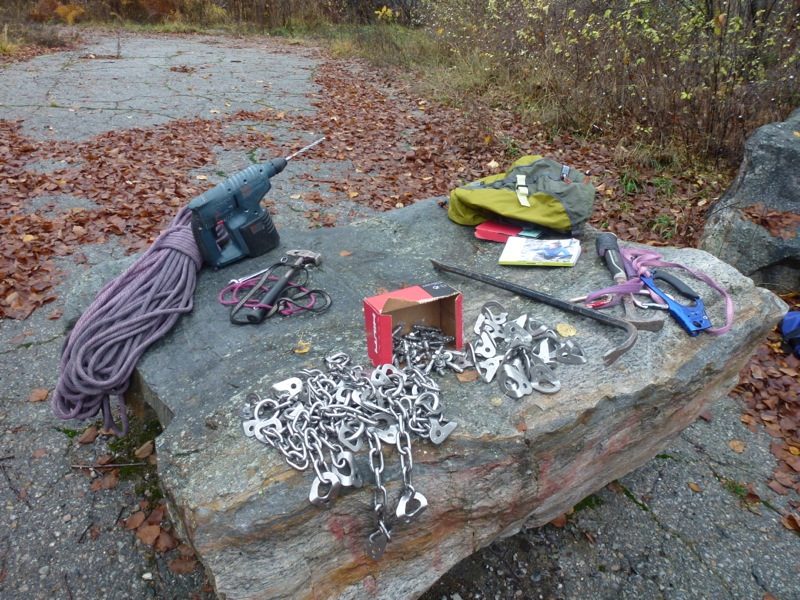
Part 1: Route Building Equipment List
- Work gloves (Watsons leather or rubber palmed work well)
- Dust mask & goggles or cheap sunglasses (for your health & safety)
- Wire brushes (the sturdier the better). Ones with an added metal paint scraper on the end are useful for leafy lichens
- Garden shears (handheld scissor type that will cut through a 1” diameter)
- Folding saw
- Hand broom or whisk with nylon bristles (the corn broom whisks just fall apart)
- Crowbar (to pry off loose and wiggly rock)
- Nut tool (for cleaning dirt and growth out of cracks)
- Big Wall Hammer (with a hole in the head to clip a carabiner) to break off loose rock, dull sharp rock edges, test for rock quality and place bolts
- An old ice axe with pick and adze work great for prying rock, scraping dirt and cleaning cracks
- Battery Powered Hammer Drill (Hilti and Bosch are the trusted names – don’t cheap out)
- Hammer Drill Bits (to be replaced every 5-20 holes or so, depending on the rock hardness)
- Bolts (at least for the anchor – leave the trees alone when you can please)
- A Blow Out Bulb (or length of tubing) and/or bolt hole brush for cleaning drill dust out of the hole
- 6 inch long 9\16” combination wrench (open at one end and closed at the other for clipping to a ‘biner on your harness)
- A bolt bag that attaches to your harness is nice to keep all the small accessories and bolts in
- A Grigri, Cinch or other auto locking device is recommended over an ATC and prussic
- Tie a small loop of cord through the handles of the brushes, saw and hand broom so they can be clipped to your harness
Unless your crag has multi-pitch opportunities, dead easy access and/or is on the way to another crag, it likely won’t be worth the effort for just one or two routes. Something with the potential for at least 4-6 lines will better ensure enough climber traffic to keep the trails and routes from growing over. Finding out whether your proposed new climbing area is on private land may also avoid a lot of headaches and disappointment later.![]()
Part 2: Choosing a New Rock Climbing Line
Think carefully about adding a new climb at an existing crag. Could the route have been climbed naturally by someone else already? Talk to the locals and/or guidebook author(s) for the low down.
If you are proposing a bolted face climb between other routes, be careful not to SQUEEZE something in where it really doesn’t fit. There is nothing more frustrating and unappreciated as bolts than can be clipped from an adjacent route. Ask yourself “do we really need another indistinct, bolted face or slab climb here?”
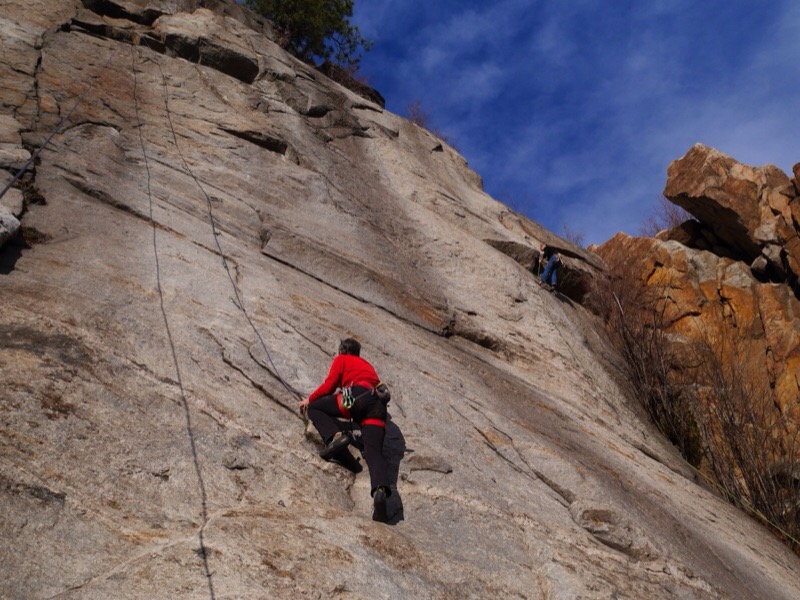
At a pre-existing crag, there may already be a set standard for the way routes are put up (i.e. ground up first ascents only). For multi-pitch routes involving tricky route finding, or naturally clean gear climbs, going ground up may be the best way. For single pitch routes that require cleaning or bolts, rap in from the top or off the anchor of an adjacent route. Figure out whether or not the line is even worthy or within your ability before taking it on.
Bolts placed on rappel are much more likely to be positioned:
- in good rock
- to reduce or eliminate rope drag
- to direct the rope away from sharp edges
- to best protect the crux
- to avoid leader falls onto bad ledges or landings
- to direct the climber where the route builder intended the climb to go
- with less likelihood of spinning in the hole
Mixed routes that have both natural gear and bolts tend to be tricky. It seems a shame to put a bolt right beside a good gear placement, but then no one wants to carry a rack up a mainly bolted route for one or two natural placements. Use your better judgement, keeping in mind that fully bolted routes are usually more popular than mixed lines (especially if the gear is marginal).
Part 3: Cleaning a New Rock Climbing Route
Cleaning a potential new line of greenery and loose rock is the most important and time consuming part of route building. Even lines that appear naturally clean may have a thin layer of lichen or dust on them that will defeat the rubber on your shoes. Here are tips to remember when cleaning a new rock climbing route:
- If a lot of scrubbing will be required initially to remove moss and other growth, then it is possible the climb will need scrubbing every one or two years. Shady climbs that seep water in the shoulder seasons and/or take a long time to dry after the rain are something to be weary of.
- Loose rock is dangerous and wiggly holds are unnerving so think about how much time you are willing to put into a route before taking on something that will require a lot of rock scaling and prying.
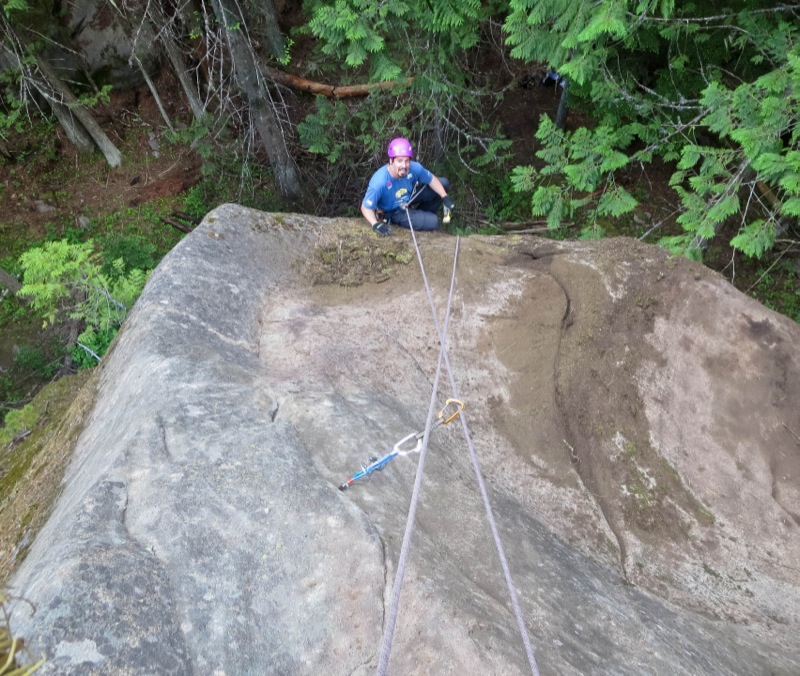
- If you are cleaning the route on rappel (which is recommended as you’ll do a much better job than on lead) start from the top and work down by descending a fixed line with a Grigri or Cinch. Tie backup knots in the rope beneath you when you stop to clean. Consider coiling the excess rope and hanging it off your harness so it is not damaged if there is rock fall. Use all the tools in your arsenal to scrub moss & lichen, cut out bushes, scrape out roots, pry and hammer off loose rock and brush all dust and debris away.
- As route builders it is our duty to make the climb as safe and enjoyable as possible. Rock pieces that wiggle might seem unlikely to come off, but traffic and rain can change that quickly. How bad would you feel if someone was hurt because you were too lazy or in denial to pry off loose rock that was destined to dislodge?
- When cleaning a route at a pre-existing crag, it’s a good idea to pick low traffic times and consider posting a spotter if there is a possibility that someone could walk around the corner and be hit by rockfall.
- Another serious hazard exists where the rope may run over sharp rock edges and be damaged or cut. Thoughtful positioning of anchors and lead bolts may be able to avoid this. If not, you can dull these edges by smacking them with your hammer and then rubbing the side of the hammer head back and forth along the resultant edge to remove any small spurs until only a rounded edge remains.
- Bushes and small trees that stick out of cracks need to have the roots removed to avoid future growth. Hacking away at small stumps with a hatchet might be necessary. Afterwards you can use the pick of the old ice axe to remove the roots from the cracks.
- Preparation of the base where the belayer stands will also determine how often your route gets climbed. If you are not lucky enough to have a naturally flat base, then a steel rake and perhaps even a shovel may be needed to create a suitable platform. If a lot of work is needed to create a retaining wall or stairs to access your route, talk to the folks at TAWKROC (The Association of West Kootenay ROck Climbers) or CASBC (Climbers Access Society of BC) about materials and perhaps even a work party to get the job done properly.
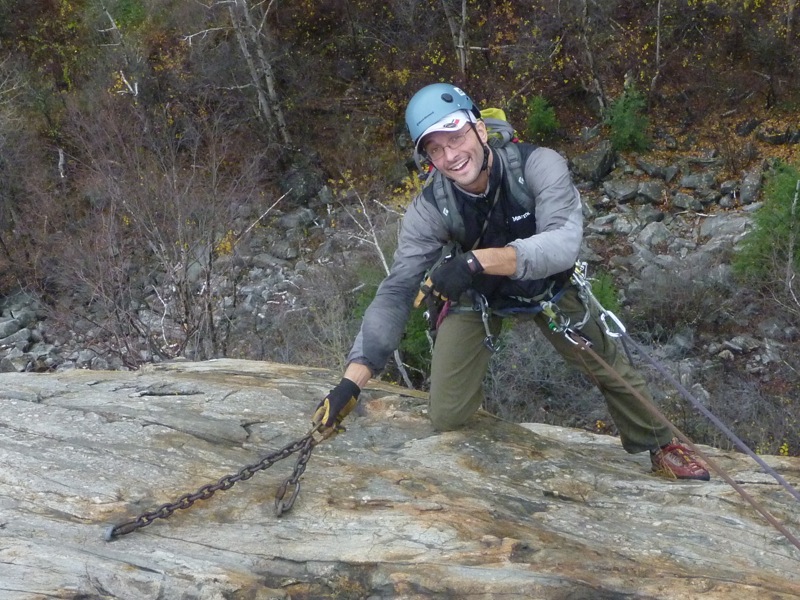
ACMG guide Dave Lussier points to old rusted anchors at Kinnaird Bluffs that were eventually replaced
Part 4: Placing Anchors
Once you are certain the line is worth your efforts, put a great deal of thought into where the anchor should be placed. You want it to be in the best rock, in line with the majority of the route and where the rope drag will be minimal or non-existent. Think about the moves you will make at the end of the climb and what hand and footholds you will use to clip the anchor.
Ideally the clip-in points of the anchor will be a quickdraw’s length away from the climber’s belay/rappel loop to secure him/her when threading the rope.
You DO NOT want the rope to run over a significant edge when lowering (this is a rookie move that will get you hated).
If the route is long it’s a good idea to place the anchor where there is no chance of a climber getting lowered off the end of a 60m rope (take into account the rope used up in knots and passing through quickdraws that may direct the rope away from the fall line). If it makes most sense to set the climb up for a 70m rope, ensure that this info is clearly stated on the topo, route description and any route info submitted for guidebook updates.
On multipitch climbs with deep belay ledges that kick back, place the anchor higher to reduce rope drag when pulling the rope after rappelling.
Often it works best to install the anchor before cleaning instead of having a loaded rope rubbing over an edge at the top of the climb while you are working on it.
Keep in mind that steel is far more durable than webbing, and rock more durable than trees. There are essentially 4 main fixed anchor configurations worth considering. Each has its place.
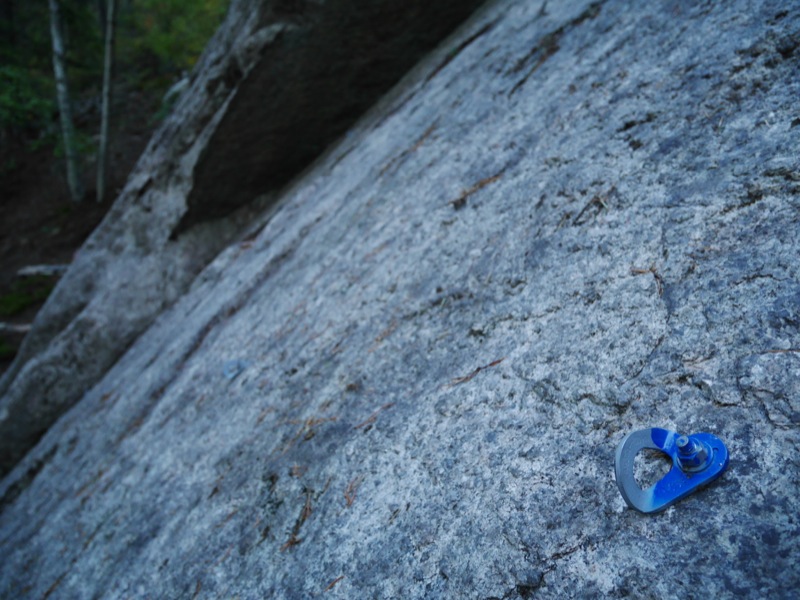
1. Fixe Ring Anchor – This anchor has the advantage over a quicklink in that the rope passes through two 50kN rings that can rotate in the hanger so the rope doesn’t grind away at the same section of steel each time someone lowers off. It is also the cheapest anchor option.
Two bolts are designed to be placed 20cm apart on the same horizontal plane. To minimize rope drag the bolts should be placed on the vertical face and not over the edge on the flat rock. An offset configuration (one bolt higher than the other) reduces the multiplication of forces, but can be awkward for TR (top rope) setup and the bolts are plenty strong enough for the applied forces. Top Ropers should have the rope set up so that it runs through focal point ‘biners on slings clipped to the rings and not through the rings directly (this is to lower off or rap only).
2. Fixe Chain Anchor – This is the most expensive option but a good one if the focal point must be extended over a rock edge or kept away from the rock to avoid rope drag
3. Fixe Traditional Anchor – This is the ideal anchor whenever it can be used as it has a single focal point that is backed up by the bolt above. The two bolts can be offset on the horizontal plane by as much as 4 cm if the rock dictates. In this instance the chain should be loose enough to allow the full load to come on the lower bolt via the ring.
This anchor can be threaded with the rope, and a carabiner clipped in to the chain to eliminate wear on the bottom ring when others are top roping. The last climber just cleans the ‘biner before lowering off.
4. Chain & Quicklinks – This is a V-shaped configuration with lap links or quicklinks connecting regular bolt hangers to lengths of chain, and a quicklink at the focal point.
This set up allows any length of chain to be used which is nice when anchor bolts must be placed far apart or far back from the edge of a climb.
This set up costs about the same as the Fixe Belay/Rap Station (as it requires independent hangers) and is less durable than the 100% stainless steel commercial anchors (as independent lengths of SS chain are very expensive). Galvanized chain can rust quite quickly where snow, mud or moss may build up around the chain in winter. Zinc coated is better but may be harder to find.
5/16” quicklinks can be used to connect the chains to the hangers. Lap links are a cheaper but inferior option as they do not allow easy replacement of worn/rusted chain. A 3/8” quicklink should be used at the focal point as it will not rotate like the Fixe rings so the wear is always on the same spot. This link should always be examined when reaching the anchor on a climb and replaced when noticeably worn.
Threading the rope through the focal point and taking the weight off with 2 quickdraws clipped to the chains is easily done to eliminate wear on the focal link while top roping.
Part 5: Positioning of Lead Bolts
This is where the true skill of a veteran route builder shines through. It is also where the inexperience of a novice builder becomes evident.
Once the anchor is in place and the route is cleaned spotless, top rope the climb with a roll of duct tape over one hand and a hammer clipped to your harness. When you get to a nice stance that feels good for clipping, check the rock quality with the hammer and place a square of duct tape where you think the bolt should go. Think about other climbers when you select a height off the good stance. If you are tall, place the bolt lower so a short person doesn’t have to make an extra move to make the clip.
The first bolt should be high enough to actually make the rope of use in the event of a fall, but not so high that it could result in a bad ground fall if the climber fell before or during clipping. If the initial moves are quite sketchy it may make more sense to place the bolt quite high with the intent of using a stick clip.
Unless the clipping stance is quite good, the second bolt should be placed so the climber clips at waist height. If the climber falls while pulling the rope overhead to make the clip, there will likely be enough slack to result in a ground fall. This can also occur on the 3rd (and perhaps even 4th) bolt, so keep the initial bolts closer together and consider the quality of the clipping stances to best determine location relative to the holds.
As each bolt position is determined, reference the last piece of tape below and look up to where the route goes. Try to select bolt positions that keep the rope running as straight as possible to reduce drag. Look for flat spots that will allow the hanger to lay uniformly against the rock. Consider how the quickdraw will look once attached to the bolt. Will the carabiner run over an edge? Will the draw pull the rope in under a roof or direct it over an edge? Carry a quickdraw with you to measure distances from your tape square to obstacles you are trying to avoid.
On multipitch routes, the first bolt after each station should be placed quite close (Fixe recommends 1m) to the anchor to minimize the risk of a factor 2 fall.
The most important consideration is to position the bolts so that they best PROTECT THE LEADER. If there is a nasty ledge that could break someone’s ankles, think of it as the ground and position bolts above it closer together and at the waist for clipping if the stances are not great.
Once all the tape is in place, lower off and stand back away from the climb to see if there are any “dog legs” where the bolts could be pulled in closer to the plum line to reduce drag. If it looks like there may be too much or too little space between the last bolt and the anchor, then the placement of the other bolts can easily be rearranged before the drilling starts.
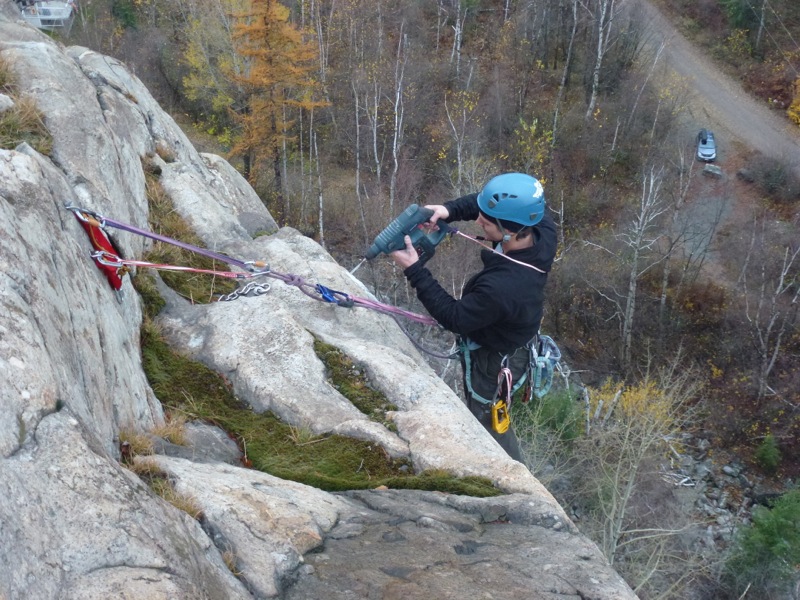
Part 6: Placing a Bolt
This is not as easy at it seems. You want to take all the necessary time and precautions to ensure doing a good job the first time. Practicing on junk rock first is recommended.
- Visually inspect the rock to avoid drilling into hairline fractures and bulges.
- Ideally bolts should be placed at least 20cm (or as close to this as rock features will allow) away from edges, cracks, weaknesses and other bolts to obtain the strongest rock. Measure your hand span or the distance from your wrist to your finger tips to get a measure of reference for 20cm (8 in.). Now you can use this reference in the field to measure bolt distances
- Rock that looks solid may be plated or hollow behind. Hit the rock where you wish to place the bolt. If the hammer gives a high pitched ring and rebounds off the rock quickly then the rock is good. Hammer all around where you wish to drill to ensure that you are not close to hollow cavities or flakes.
- Before drilling, wrap a piece of duct tape around the bit to mark the hole depth so that you drill the hole about 1/4” longer than the length of the bolt. This is called OVERDRILLING and allows you to easily erase a badly placed bolt by hammering it deep inside the hole (see the section on Retrofitting)
- Drill at a right angle to the surface of the rock to ensure that the hanger sits flush and there is no torque on the bolt. Hammer away small irregularities in the rock surface before hand to ensure flushness (if need be).
- Half way through drilling, pull the bit out of the hole and let it cool down a bit to avoid overheating and shortening the bit life. Avoid changing the angle on the drill once the hole is started as the bolt may spin in the hole if it is too wide. Expect to retire bits much more often in hard rock like Quartzite or hardened granite, and consider cycling through 2 different bits so they get a chance to cool. Ensure properly drilled holes by retiring old bits as soon as they become dull (i.e. take longer to drill a hole on a fully charged battery or drill fewer holes per charge).
- Use a Blow Out Bulb or piece of tubing to blow the dust out of the hole. A bolt hole brush will further ensure that no residual dust prevents the bolt sleeve from biting in the hole.
- 3” x 3/8” stainless steel wedge anchor bolts are the norm and Hilti is the industry standard. Following the UIAA standard for rock anchors, in-hole bolt depths must be at least 5 times the hole diameter (not including the external bolt length assigned for the hanger, washer and nut). This means a min. bolt length of 2 ½” in hard rock like quartzite (if no washer is used and the bolt extends beyond the nut no more than 3/16”). Longer than 3” bolts may be required in aerated limestone.
- Don’t even think about cheaping out and using non-stainless bolts or homemade hangers. They will only have to be chopped later and your name will be mud. Also note that mixing alloys (i.e. stainless hanger with galvanized bolt) results in a chemical reaction that promotes rapid Galvanic Corrosion. Ensure that the bolt, washer, nut and hanger are ALL stainless steel to avoid this.
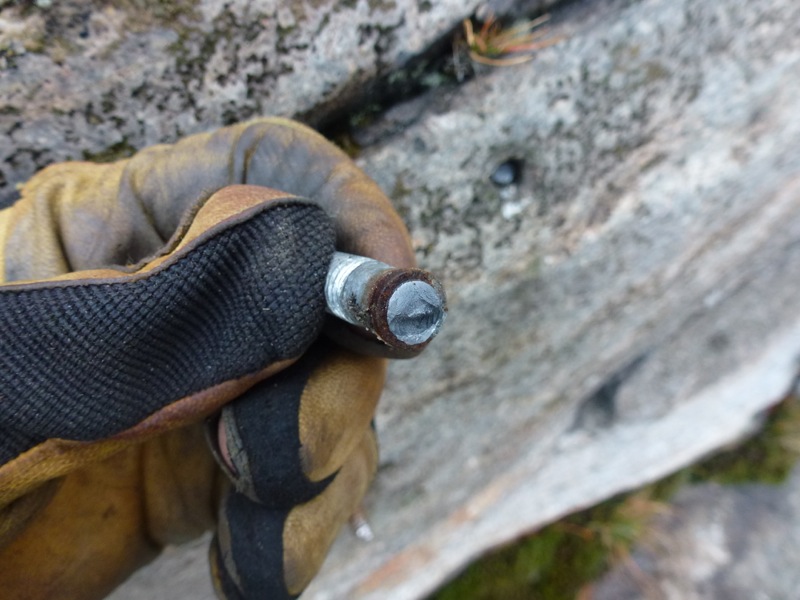
- Place the hanger, washer and nut on the bolt so that the threads are barely visible above the nut and hammer the bolt into the hole. Ensure the nut has not repositioned itself before the final taps to make the hanger flush. NOTE – if the hammer is hitting the nut instead of the bull nose end of the bolt you risk damaging the threads and/or nut which can result in a spinner (bolt that spins in the hole).
- If the hanger is not sitting properly, give it a tap with the hammer. Regular hangers (not holding a fixed ring) should be placed with the low point in line with the bolt and the direction of pull. Tighten the nut with a 9/16” wrench with a torque of 20 ft-lb. (for Hilti bolts). This is not a lot of force. Basically what you can muster with one hand on a 6 inch long wrench. Don’t use two hands and certainly don’t use a long wrench or extension as you can weaken and even shear off the bolt with too much torque. Once tightened, the bolt should not protrude beyond the nut more than ½” for “D” length 3” bolts, and no more than 3\16” for “C” length 2 ½” bolts (with no washer). Do not try to hammer the bolt deeper after it has been tightened with the nut as this will cause the sleeve to reposition and may result in a spinner.
Part 7: Retrofitting Bolts & Anchors
Old rusty bolts and anchors that need replacing can be problematic and will leave ugly scars or mangled metal if not removed properly. To remove an expansion bolt that you KNOW has been overdrilled, the solution is simple:
- Remove the nut and hanger (use WD40 for the rust)
- Hammer the bolt flush with the rock and then countersink it deep in the hole using the nose or tip of another bolt (not the wedge end as it might get stuck in the hole)
- Insert a dab of clear epoxy and then hammer a small tight fitting rock into the hole. This works well for softer rock like limestone – in harder rock you may need to mix some rock dust in with the epoxy instead.
For bolts that have not likely been overdrilled you will need to break the end off before countersinking them. This may be accomplished with a long wrench and an extender bar that you can slide over the end of the wrench to make it longer. With this much torque you should easily be able to tighten the nut until it shears the bolt off. Ensure a tight fit by using the correct sized wrench or you will likely just round the corners off of the nut.
If the bolt spins in the hole when you try to over tighten it, then you will have to break it off with a hammer. Simply hammering the bolt sideways until it bends over may not break it, and may require a crowbar to pry it away from the rock which can lead to scaring. To minimize damage to the rock, hit the bolt with alternate blows from the left and right, gradually weakening the metal until eventually it snaps.
New bolts will ideally be placed 20cm away from old bolt holes, but the rock may not always allow this much spacing. When the rock is harder and more uniformly solid, less space is required.
Note – whenever possible you should have permission from the first ascensionist, and/or support from the local climbing community before retrofitting old routes.